Drawing Outside the Lines: Getting the Most Out of the Splatink Font
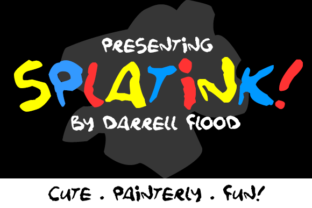
A font that throws away the ruler and dances with a paintbrush is hard to resist. Darrell Flood's Splatink captures that exact spirit: a celebration of imperfection. It is cute, loose, splattered, and unapologetically messy in the best possible way. For educators, small business owners, content creators, and designers crafting projects for children or playful brands, this typeface offers an instant shortcut to warmth and authenticity.
However, the very qualities that make Splatink charming can also trip up even experienced creators. That freeform energy needs room to breathe, and without thoughtful application, it can easily overwhelm a layout or become unreadable. This article covers the most common missteps people make with expressive paint-style fonts like Splatink and provides practical fixes so you can harness its full creative potential without sacrificing clarity or professionalism.
Before You Start: What Splatink Actually Does Best
Understanding the intended role of your tools prevents many problems before they begin. Splatink is unequivocally a display font. Its primary job is to grab attention, convey personality, and set a tone of playful creativity. Those uneven edges, drips, and splatters are not flaws; they are features designed to evoke finger paints, crayons, and handmade school projects.
The most common underlying mistake is treating it as a general-purpose workhorse font. When you force a paint-splattered typeface into a role meant for a neutral sans-serif, friction is inevitable. Accept upfront that Splatink is a specialist. It thrives in headlines, logos, short posters, product labels for toys or crafts, and social media graphics aimed at families. When you respect its domain, the results look intentional and polished rather than chaotic.
Mistake 1: Clamping Down on the Chaos
Beginners often instinctively apply the same spacing and alignment rules to Splatink that they would to a geometric font. They tighten the letter spacing to compress the layout, align the text to a strict baseline grid, and try to force the letters into a clean rectangle. This immediately neutralizes the font's most valuable asset: its natural rhythm.
The result: The letters start competing with each other. Splatters overlap in awkward places, creating unintentional dark spots. The overall effect looks tense and slightly off-kilter, like the text is being choked.
The better approach: Give Splatink room to play. Increase your letter tracking (the overall spacing between characters) by a few points more than you think it needs. Allow the descenders and ascenders to extend into the whitespace around the text. Use ample margins and padding. A design featuring Splatink should feel open and airy. Think of setting the headline on a clean, uncluttered backdrop where the paint texture becomes the main visual accent.
Mistake 2: Using It for the Wrong Job
This is the most frequent offender. A font can be beautiful and fun and still be completely wrong for a specific task. Using Splatink for long paragraphs, body text, fine print, or critical navigation menus is a readability disaster waiting to happen.
The impact: At small sizes, those charming splatters and irregular letterforms blend into visual noise. The reader has to decode each word instead of reading it fluidly. For anyone with visual impairments or reading difficulties, it becomes almost inaccessible. This directly undermines communication and frustrates your audience.
The better approach: Reserve Splatink exclusively for short, impactful text. Headlines, sub-headers, short callout boxes, and logos. For everything else, pair it with a clean, highly legible typeface. A neutral sans-serif like Open Sans, Poppins, or Lato makes an excellent companion. This contrast does two important things: it solves the readability problem, and it makes the Splatink headline pop even more by giving the eye a clear visual break and hierarchy.
Mistake 3: Fighting the Texture
Because Splatink has such a strong physical texture, it demands a solid foundation. A common oversight is placing it directly over a busy photographic background, a complex pattern, or a similarly textured element. The uneven edges of the font simply get lost in the noise.
The scenario: You have a great photo of a colorful classroom and set a vibrant Splatink title directly over the image. The drips and splashes merge with the clutter of desks, books, and toys. Your headline becomes nearly invisible.
The solution requires a few practical checks:
- Use a solid backing: Place the text inside a solid color block, badge, or ribbon to isolate it from the background.
- Apply a subtle drop shadow: A crisp, simple shadow creates a necessary boundary that separates the font from whatever is behind it.
- Choose high-contrast colors: Stick to bold pairings. Dark charcoal on pale pastel, or bright white on a vibrant primary color, works reliably.
- Check the file format: For print projects, always ensure you are using a vector format (OTF or TTF) so the splatter details remain razor-sharp at large sizes. Avoid low-resolution versions that can pixelate the fine edges.
Mistake 4: Ignoring the Audience and Platform
"Cute and messy" carries a specific tone. It is ideal for a preschool logo, a summer camp flyer, a bakery label, or a children's book cover. It feels jarring and out of place in a medical brochure, a legal document, or a corporate financial report.
The misunderstanding: Believing that "fun" equals "universal." Context is everything.
The corrective action: Before you drag Splatink into your design canvas, step back and ask a few honest questions. Who is the audience? What is the formality of the occasion? Does the message need to feel handmade and spontaneous? If the answer is no, choose a different font. It is not a failure of the font; it is a matter of appropriate application.
Platform nuances also matter. On a small mobile screen, the fine splatters can shrink down to a blurry fuzz. Always preview your design at the actual size and resolution it will be viewed. A headline that looks fantastic on a 27-inch monitor might become an indistinct blob on an Instagram story. Testing early prevents last-minute panic.
Practical Advice for Getting It Right
How do you consistently avoid these pitfalls and let Splatink shine? Here is a short checklist you can apply to your next project.
- Assess fit honestly: Does the project call for handmade, playful energy? Yes? Proceed. No? Save it for another day.
- Pair with purpose: Choose your companion typeface early. Keep the total font count to two or three to avoid a visual cacophony. A solid geometric sans-serif keeps the layout grounded.
- Test early and often: Try the font at your target sizes and on your intended backgrounds during the rough draft stage, not after you have polished everything else.
- Respect the rhythm: Do not be afraid of negative space. Adjust the letter tracking so that splatters do not bleed awkwardly into neighboring letters. The white space is part of the design.
- Verify your license: Font licenses vary. Always check that your intended use, whether commercial printing or web embedding, is covered by the license from Darrell Flood's foundry. This protects you legally and supports the creator.
The Core Principle: Work With the Font, Not Against It
Splatink is not a font that blends in. It has a strong voice, and it takes a confident designer to use it effectively. The mistakes discussed here typically stem from trying to control it too much or using it in contexts that contradict its nature. The payoff for getting it right is substantial: a design that feels immediate, joyful, and human in a way that perfectly polished typefaces cannot replicate.
By giving the text room to breathe, reserving it for short-form content, pairing it with clean companions, and respecting your audience and platform, you unlock exactly what Darrell Flood built into this typeface. You get a tool that communicates warmth, creativity, and a sense of handmade wonder. That is a valuable asset to have in your design toolkit.